Installing Caddy on Linux
Overview
Caddy is a powerful, enterprise-ready web server with automatic HTTPS that makes serving your sites easy. This comprehensive guide covers installation and configuration on Linux systems with proper security configurations, systemd integration, and DuckDNS support.
What is Caddy?
Caddy is a modern web server that provides:
- Automatic HTTPS: SSL certificates managed automatically
- Reverse Proxy: Route traffic to backend applications
- Static File Serving: Serve websites and files efficiently
- Plugin System: Extend functionality with plugins
- Easy Configuration: Simple, readable configuration files
Key Features
- Zero-Config HTTPS: Automatic SSL certificate provisioning and renewal
- HTTP/2 and HTTP/3: Modern protocol support out of the box
- Reverse Proxy: Load balancing and backend routing
- Static Site Hosting: Perfect for modern web applications
- Plugin Ecosystem: DNS providers, authentication, and more
Prerequisites
Before beginning the installation, ensure your system meets the following requirements:
System Requirements
- Operating System: Linux distribution (Ubuntu 18.04+, Debian 9+, CentOS 7+, RHEL 7+, or equivalent)
- Architecture: x86_64 (amd64) or ARM64
- RAM: Minimum 512MB (1GB+ recommended for production)
- Disk Space: At least 100MB free space
- Network: Internet connection for downloading packages and certificates
Required Permissions
- Root or sudo access for system-level installation
- Port access: Ability to bind to ports 80 and 443
- Firewall configuration permissions
Network Requirements
- Ports 80 and 443 must be accessible from the internet
- Domain name pointing to your server's public IP (for HTTPS)
- Router/firewall configured to forward traffic
Installation
Step 1: Check System Information
First, identify your system architecture and distribution:
Check OS distribution and version
lsb_release -a
Check system architecture
uname -m
Check available memory
free -h
Example output for Ubuntu 24.04:
Distributor ID: Ubuntu
Description:    Ubuntu 24.04 LTS
Release:        24.04
Codename:       noble

Step 2: Download Custom Caddy Build
Plugin Selection: Before downloading, select the plugins you need. Common plugins include:
- Cloudflare DNS: For automatic DNS-01 challenge with Cloudflare
- DuckDNS: For dynamic DNS with DuckDNS service
- Route53: For AWS Route53 DNS management
-
Visit the Caddy Download Page: Caddy Download Builder
-
Select Required Plugins:
- For Cloudflare:
github.com/caddy-dns/cloudflare - For DuckDNS:
github.com/caddy-dns/duckdns
- For Cloudflare:
-
Download the Custom Build: Navigate to downloads directory
cd ~/DownloadsDownload using curl (Replace with your Custom-build URL)
curl -L -H "User-Agent: Mozilla/5.0" \-o caddy \"https://caddyserver.com/api/download?os=linux&arch=amd64&p=github.com%2Fcaddy-dns%2Fcloudflare&p=github.com%2Fcaddy-dns%2Fduckdns"notewgetmay not download the binary correctly from the Caddy API. Usecurlwith the-Lflag to follow redirects and a browserUser-Agentheader to ensure the binary is downloaded properly.
Step 3: Install the Binary
-
Make the binary executable:
chmod +x caddy -
Verify the binary: Check if the binary works
./caddy versionVerify plugins are included
./caddy list-modules | grep dns -
Install to system location: Copy to system binary directory
sudo cp caddy /usr/bin/caddyVerify system installation
caddy version
Expected output:
v2.7.6 h1:w0NymbG2m9PcvKWsrXO6EEkY9Ru4FJK8uQbYcev1p3A=
The version number and hash will differ depending on when you downloaded the binary.

System Configuration
Step 4: Create System User and Group
For security best practices, Caddy should run as a dedicated system user with minimal privileges.
-
Create the caddy system group:
sudo groupadd --system caddy -
Create the caddy system user:
sudo useradd --system \--gid caddy \--create-home \--home-dir /var/lib/caddy \--shell /usr/sbin/nologin \--comment "Caddy web server" \caddyExplanation of parameters:
--system: Creates a system user (UID < 1000)--gid caddy: Assigns user to the caddy group--create-home: Creates the home directory--home-dir /var/lib/caddy: Sets home directory for data storage--shell /usr/sbin/nologin: Prevents interactive login for security--comment: Adds descriptive comment
Step 5: Configure Systemd Service
Create a systemd service file for proper service management and automatic startup.
-
Create the service file:
sudo nano /etc/systemd/system/caddy.service -
Add the following service configuration:
[Unit]Description=CaddyDocumentation=https://caddyserver.com/docs/After=network.target network-online.targetRequires=network-online.target[Service]Type=notifyUser=caddyGroup=caddyExecStart=/usr/bin/caddy run --environ --config /etc/caddy/CaddyfileExecReload=/usr/bin/caddy reload --config /etc/caddy/Caddyfile --forceTimeoutStopSec=5sLimitNOFILE=1048576PrivateTmp=trueProtectSystem=fullAmbientCapabilities=CAP_NET_ADMIN CAP_NET_BIND_SERVICE# --- Additions beyond the official Caddy service file ---# Prevents the process from gaining new privileges via setuid/capabilitiesNoNewPrivileges=true# Do not restart if Caddy exits with code 1 (e.g. config error)RestartPreventExitStatus=1# Automatically restart Caddy if it crashes unexpectedlyRestart=on-failureRestartSec=5s# Raises the process limit beyond the default (official uses LimitNOFILE only)LimitNPROC=1048576[Install]WantedBy=multi-user.targettipThe lines marked "Additions beyond the official Caddy service file" are optional hardening extras not present in the official caddy.service. They are safe to include but can be removed if you prefer to stay exactly on the official defaults. The official file recommends using
sudo systemctl edit caddyto add overrides non-destructively.Key service features:
- Security: Runs as non-root user with minimal capabilities
- Automatic restart: Restarts on failure (except exit code 1)
- Resource limits: Prevents resource exhaustion
- Network capabilities: Can bind to privileged ports (80, 443)
-
Reload systemd to register the new service file:
sudo systemctl daemon-reloadnoteDo not start or enable the service yet — Caddy requires a valid Caddyfile before it can run. Complete Steps 6 and 7 first, then start the service in Step 13.
Step 6: Create Configuration Directory
-
Create the Caddy configuration directory:
sudo mkdir -p /etc/caddy -
Set proper ownership and permissions:
sudo chown -R root:caddy /etc/caddysudo chmod 755 /etc/caddy -
Verify the data directory was created correctly:
The
--create-homeflag in Step 4 already created/var/lib/caddyowned by thecaddyuser. Confirm it looks correct:ls -la /var/lib/caddyExpected output: the directory should be owned by
caddy:caddy.total 20drwxr-x--- 2 caddy caddy 4096 Jan 15 10:00 .drwxr-xr-x 30 root root 4096 Jan 15 10:00 ..-rw-r--r-- 1 caddy caddy 220 Jan 7 2023 .bash_logout-rw-r--r-- 1 caddy caddy 3771 Jan 7 2023 .bashrc-rw-r--r-- 1 caddy caddy 807 Jan 7 2023 .profileThe
.bash_logout,.bashrc, and.profilefiles are skeleton files copied automatically byuseradd --create-homeand can be ignored — Caddy does not use them.warningIf the ownership shows
root:rootinstead, it means/var/lib/caddywas created before Step 4 ran. Fix it with:sudo chown -R caddy:caddy /var/lib/caddyIncorrect ownership here will cause a
failed storage check: failed to create temp fileerror when Caddy starts.
Configuration
Step 7: Create Initial Caddyfile
-
Create the main configuration file:
sudo nano /etc/caddy/Caddyfile -
Add a basic configuration (replace with your domain):
# Basic example - replace with your domainexample.com {respond "Hello, World!"}# Reverse proxy example# app.example.com {# reverse_proxy localhost:3000# } -
Set proper permissions:
sudo chown root:caddy /etc/caddy/Caddyfilesudo chmod 644 /etc/caddy/Caddyfile
Configuration Examples: For more advanced configurations, visit our Caddy Examples page.
Step 8: Network Configuration
Before configuring domains and DNS, identify your network setup:
Install network utilities
sudo apt update && sudo apt install -y net-tools curl
Find your internal IP address
ip addr show | grep 'inet ' | grep -v '127.0.0.1'
Alternative method
hostname -I
Find your public IP address
curl -4 ifconfig.me
Example output:
Internal IP: 192.168.1.100
Public IP: 203.0.113.1
Step 9: Configure Firewall
Ensure the necessary ports are open:
For Ubuntu/Debian with UFW
sudo ufw allow 80/tcp
sudo ufw allow 443/tcp
sudo ufw reload
For CentOS/RHEL with firewalld
sudo firewall-cmd --permanent --add-service=http
sudo firewall-cmd --permanent --add-service=https
sudo firewall-cmd --reload
Verify firewall status
sudo ufw status
Ubuntu/Debian
sudo firewall-cmd --list-all # CentOS/RHEL
DuckDNS Integration
DuckDNS provides free dynamic DNS services, perfect for home servers with changing IP addresses.
Step 10: Create DuckDNS Account
- Visit DuckDNS.org and sign in with:
- Google Account
- GitHub Account
- Reddit Account
- Twitter Account

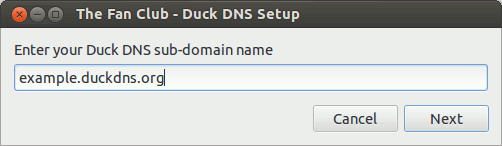
- Create a subdomain:
- Enter your desired subdomain (e.g.,
myserver) - Click "Add Domain"
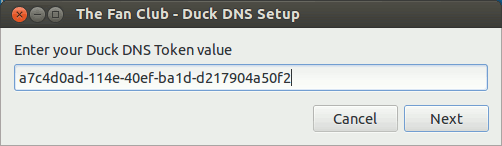
- Note your token for later use
- Enter your desired subdomain (e.g.,

Step 11: Install DuckDNS Client
Install required packages
sudo apt install -y curl cron
Create DuckDNS directory
sudo mkdir -p /opt/duckdns
cd /opt/duckdns
Download the update script
sudo curl -o duck.sh "https://www.duckdns.org/update?domains=YOURSUBDOMAIN&token=YOURTOKEN&ip="
Make it executable
sudo chmod +x duck.sh
Test the script
sudo ./duck.sh
DuckDNS Installation Page:

Step 12: Setup Automatic Updates
Edit crontab for automatic updates
sudo crontab -e
Add this line to update every 5 minutes
*/5 * * * * /opt/duckdns/duck.sh >/dev/null 2>&1
DuckDNS GUI Setup Process:
DuckDNS GUI with Token Configuration:
Service Management
Step 13: Start and Enable Caddy
-
Enable and start Caddy service:
sudo systemctl enable --now caddy -
Verify service status:
sudo systemctl status caddy
Expected output:
● caddy.service - Caddy
Loaded: loaded (/etc/systemd/system/caddy.service; enabled; vendor preset: enabled)
Active: active (running) since Mon 2024-01-15 10:30:00 UTC; 5s ago
Step 14: Verify Installation
-
Test configuration syntax:
sudo caddy validate --config /etc/caddy/Caddyfile -
Check if Caddy is listening on ports:
sudo netstat -tlnp | grep caddy -
Test HTTP response (replace with your domain):
curl -I http://your-domain.com
Linux Service Commands
Check service status
sudo systemctl status caddy
Start the service
sudo systemctl start caddy
Stop the service
sudo systemctl stop caddy
Restart the service
sudo systemctl restart caddy
Reload configuration without stopping
sudo systemctl reload caddy
Enable auto-start on boot
sudo systemctl enable caddy
Disable auto-start on boot
sudo systemctl disable caddy
Troubleshooting
Common Issues
Issue 1: Service Won't Start
Check service status and logs
sudo systemctl status caddy
sudo journalctl -u caddy -n 20
Common causes:
- Configuration syntax errors
- Permission issues
- Port conflicts
Solution:
Validate configuration
sudo caddy validate --config /etc/caddy/Caddyfile
Check file permissions
ls -la /etc/caddy/Caddyfile
sudo chown root:caddy /etc/caddy/Caddyfile
sudo chmod 644 /etc/caddy/Caddyfile
Issue 2: Certificate Errors
Check stored certificates
ls /var/lib/caddy/.local/share/caddy/certificates/
Query certificate status via the admin API
curl -s localhost:2019/pki/ca/local
View certificate-related logs
sudo journalctl -u caddy | grep -i cert
Solution:
Ensure domain points to your server
nslookup your-domain.com
Check if ports 80 and 443 are accessible
sudo netstat -tlnp | grep :80
sudo netstat -tlnp | grep :443
Issue 3: Permission Denied Errors
Check Caddy user permissions
sudo -u caddy ls -la /var/lib/caddy
Solution: Fix ownership and permissions
sudo chown -R caddy:caddy /var/lib/caddy
sudo chmod 750 /var/lib/caddy
Debug Mode
For detailed troubleshooting, run Caddy in debug mode:
Stop the service
sudo systemctl stop caddy
Run in debug mode
sudo -u caddy /usr/bin/caddy run --config /etc/caddy/Caddyfile --adapter caddyfile --debug
Security Best Practices
File Permissions
Secure configuration files
sudo chmod 644 /etc/caddy/Caddyfile
sudo chown root:caddy /etc/caddy/Caddyfile
Secure data directory
sudo chmod 750 /var/lib/caddy
sudo chown caddy:caddy /var/lib/caddy
Secure binary
sudo chmod 755 /usr/bin/caddy
sudo chown root:root /usr/bin/caddy
Firewall Configuration
Configure and enable UFW with a secure ruleset:
| Command | What it does |
|---|---|
sudo ufw allow ssh comment 'SSH' | Allows SSH access — run this first to avoid being locked out |
sudo ufw default deny incoming | Blocks all incoming connections by default |
sudo ufw default allow outgoing | Allows all outgoing connections by default |
sudo ufw allow 80/tcp comment 'HTTP' | Opens port 80 for HTTP traffic |
sudo ufw allow 443/tcp comment 'HTTPS' | Opens port 443 for HTTPS traffic |
sudo ufw enable | Activates the firewall and applies all rules |
sudo ufw allow ssh comment 'SSH'
sudo ufw default deny incoming
sudo ufw default allow outgoing
sudo ufw allow 80/tcp comment 'HTTP'
sudo ufw allow 443/tcp comment 'HTTPS'
sudo ufw enable
Always run sudo ufw allow ssh before sudo ufw enable. If you enable the firewall first with no SSH rule, you will be locked out of your server.
Regular Updates
Update system packages
sudo apt update && sudo apt upgrade -y
For manual installation, check for updates regularly
caddy version
Performance Optimization
System Limits
Add to /etc/security/limits.conf:
caddy soft nofile 65536
caddy hard nofile 65536
Systemd Service Optimization
The service file already includes optimizations:
LimitNOFILE=1048576: Increased file descriptor limitLimitNPROC=1048576: Increased process limitPrivateTmp=true: Isolated temporary directoryProtectSystem=full: Read-only system directories
Backup and Maintenance
Configuration Backup
Create backup directory
sudo mkdir -p /opt/caddy-backup
Backup configuration
sudo cp /etc/caddy/Caddyfile /opt/caddy-backup/Caddyfile.$(date +%Y%m%d)
Backup certificates (if needed)
sudo tar -czf /opt/caddy-backup/caddy-data-$(date +%Y%m%d).tar.gz /var/lib/caddy
Automated Backup Script
Create /opt/caddy-backup/backup.sh:
#!/bin/bash
BACKUP_DIR="/opt/caddy-backup"
DATE=$(date +%Y%m%d_%H%M%S)

# Backup configuration
cp /etc/caddy/Caddyfile "$BACKUP_DIR/Caddyfile.$DATE"

# Backup data directory
tar -czf "$BACKUP_DIR/caddy-data-$DATE.tar.gz" /var/lib/caddy

# Keep only last 7 days of backups
find "$BACKUP_DIR" -name "*.tar.gz" -mtime +7 -delete
find "$BACKUP_DIR" -name "Caddyfile.*" -mtime +7 -delete
Make it executable and add to cron:
sudo chmod +x /opt/caddy-backup/backup.sh
sudo crontab -e
# Add: 0 2 * * * /opt/caddy-backup/backup.sh
Next Steps
Advanced Configuration
- Explore advanced directives:
header,encode,rate_limit - Set up monitoring: Prometheus metrics, health checks
- Configure logging: Custom log formats and rotation
- Implement security headers: HSTS, CSP, X-Frame-Options
Integration Examples
- Docker containers: Reverse proxy to containerized applications
- Load balancing: Distribute traffic across multiple backends
- API gateway: Route and transform API requests
- Static sites: Serve static websites with automatic HTTPS
Resources
- Official Documentation: caddyserver.com/docs
- Community Forum: caddy.community
- Configuration Examples: Caddy Examples
Summary
You have successfully installed Caddy on Linux with:
✅ Secure installation with dedicated system user
✅ Systemd integration for service management
✅ Automatic HTTPS capability with zero configuration
✅ DuckDNS integration for dynamic DNS management
✅ Proper file permissions and security hardening
✅ Production-ready configuration - Enterprise deployment ready
Your Caddy installation is now ready for production use with automatic HTTPS, robust security, and professional service management on Linux.
💻️Buy me a PC Part